


In this post, I’ll provide a step-by-step guide covering how to use Liquity on DeFi Saver — which provides powerful tools for interacting with Liquity and other borrowing protocols in the DeFi ecosystem.
Quick Disclaimer: This tutorial is not a recommendation and interacting with DeFi protocols can be risky. Please do your own research and use your best judgement.
What is DeFi Saver?
DeFi Saver is an advanced management dashboard that integrates various DeFi protocols and provides unique tools for users.
At time of writing, Liquity is supported by DeFi Saver’s Boost and Repay options and the Recipe Creator, while Trove-Automation and one-transaction leveraged Troves are still in the pipeline.
The Boost and Repay options are quite simple, but useful for borrowers that actively manage their Trove. We’ll discuss why later in this tutorial.
What really makes DeFi Saver unique is their Recipe Creator. Users can combine almost any multi-step process into one transaction according to their needs — potentially saving users hundreds or thousands in gas fees. Additionally, you can migrate existing MakerDAO, Aave, Compound, and Reflexer ETH-stablecoin positions to a Liquity Trove. I’ll explain how in the last section 😉
DSProxy / Smart Wallet Explained
When you open a position with any protocol on DeFi Saver, you’re creating it on a “Smart Wallet”. In short, a Smart Wallet is a DSProxy smart contract wallet that is created, owned, and accessible by you and only you. This contract allows for complex, multi-step interactions to be executed in a single transaction and it can also be used to potentially allow other services to execute transactions on your behalf (e.g. Automation). Find more on DSProxy here.
If you already have a Trove that was created using other Liquity frontends, you can still manage it at DeFi Saver, though you won’t have access to any of the advanced features. This means you’ll have to close your existing Trove and open a new one on DeFi Saver if the tools are what you’re seeking. Although this may be the deciding factor for most, users should consider the possibility of Liquity frontends supporting DSProxy in the future — which would make them compatible with DeFi Saver.
As some of you may know, Liquity is soon to be integrated by Instadapp, a similar protocol that has similar tools to DeFi Saver. Instadapp has their own version of the Smart Wallet called the DSA, but it’s exclusive to their users. I won’t get into a detailed comparison here and you’ll have to do your own research, but just keep in mind that these two different smart contract wallets are not compatible.
Opening a Trove
For users wanting to open a Trove, start here. Otherwise, you can skip to “Utilizing the Recipe Creator”.
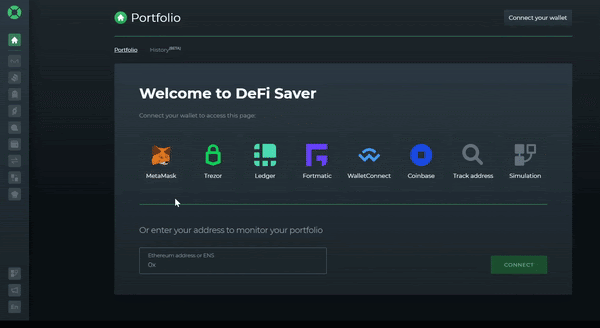
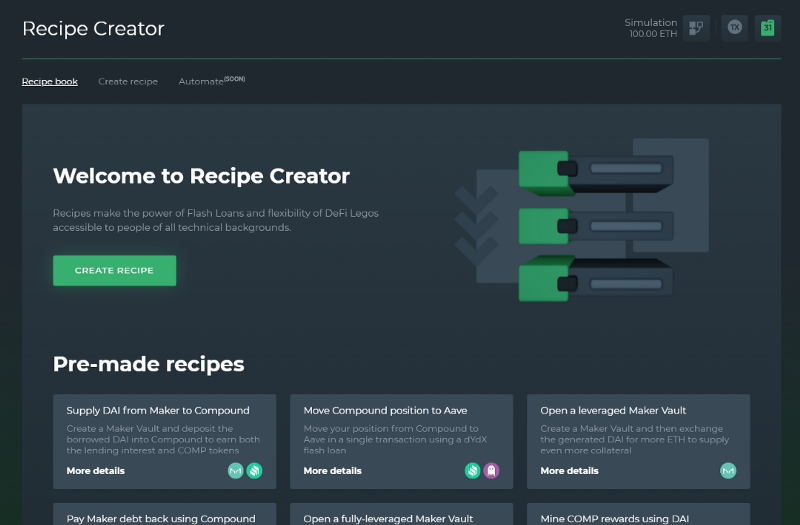
To open a Trove, users first need to access their homepage. After connecting your wallet, the page will transform into this:

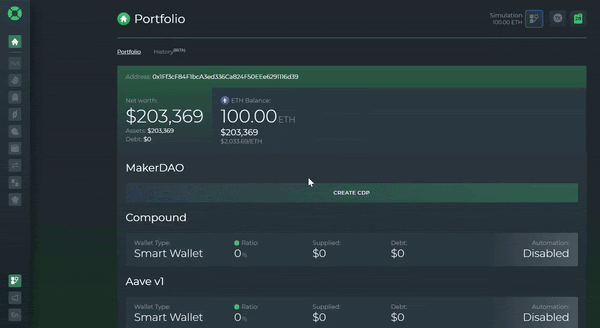
It should show your assets and any existing positions you may have. Feel free to browse around to get a feel for the UI.
Optional: Simulation Mode
One useful feature that DeFi Saver provides is its Simulation Mode. Basically, entering this mode allows you to use the protocol with “fake” funds (hence the 100 ETH I have above) or a simulation of funds in your wallet for testing purposes.
Pretty cool, right? Learning these new tools can be overwhelming and that’s where Simulation Mode comes in handy. You can access this mode by switching the toggle displayed below:
Creating a Smart Wallet and Opening a Trove:
When you click the UI’s “Liquity” button (displayed below), the Liquity Dashboard will open:
Here, you can deposit your ETH collateral and borrow LUSD. I’m opting to deposit 10 ETH and borrow 10,000 LUSD. Of course, you can adjust this to your liking as long as it meets the minimum requirements (i.e. >= 110% collateral ratio, >= 2,000 minimum debt including the Liquidation Reserve).
As you can see, many stats appear on the right-hand side of the dashboard as I input values. You can hover your mouse over each one and an explanation will appear. I’d recommend going through each explanation before opening a Trove.
Now, all that’s left to do is click “Create” at the bottom of the UI. After doing this, transactions to create a Smart Wallet and to open a Trove will appear. It’s that simple.
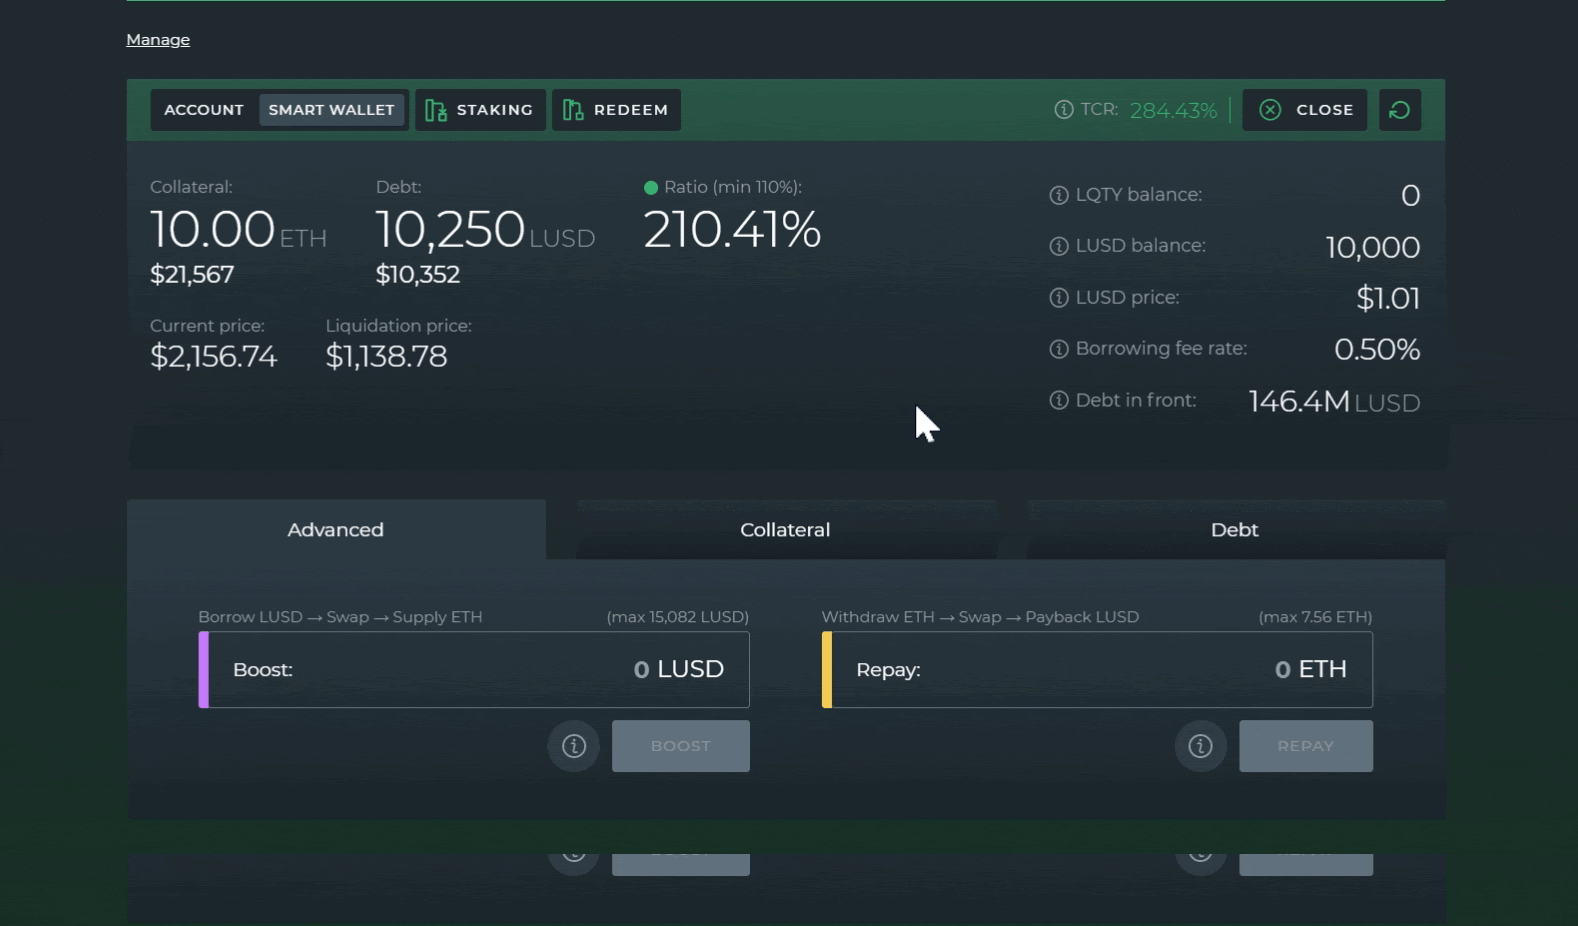
After your transactions are signed and confirmed, you’ll officially be a Trove owner! If you need to make any adjustments to your Trove, you can use the bottom three tabs: Advanced, Collateral, and Debt.
The Liquity Dashboard also allows you to deposit LUSD to the Stability Pool, stake LQTY, and perform a Redemption in the top two tabs.
Note: DeFi Saver’s Kickback Rate is 100% — meaning they take no cut out of the LQTY you earn from the Stability Pool!
What are the Boost and Repay functions?
If you’re seeking to increase your leverage, you can do this using “Boost”, which borrows more LUSD > swaps to ETH > and supplies ETH to your Trove in one transaction. By the way (for the degens reading this), Liquity’s low minimum collateral ratio of 110% allows for relatively high leverage.
If you’re looking to do the opposite, you can use “Repay”, which withdraws ETH collateral > swaps to LUSD > and repays debt in one transaction. To sum it up, users who actively monitor their Trove and like to adjust to market conditions can save themselves a headache (and gas) by using these functions.
To learn more about managing your Trove, here’s a guide to Trove Management written by Kolten.
Utilizing the Recipe Creator
For users who are seeking to perform more complex transactions with Liquity or to migrate an existing position, you’ll want to start by entering the Recipe Creator. As far as I know, this tool is one of a kind and no other protocol has anything similar that’s accessible in their UI.
At first glance, you’ll notice there’s an option to create your own recipe (i.e. a set of actions) and an option to use pre-made recipes.
Pre-Made: Migrating a Maker ETH Vault to a Liquity Trove
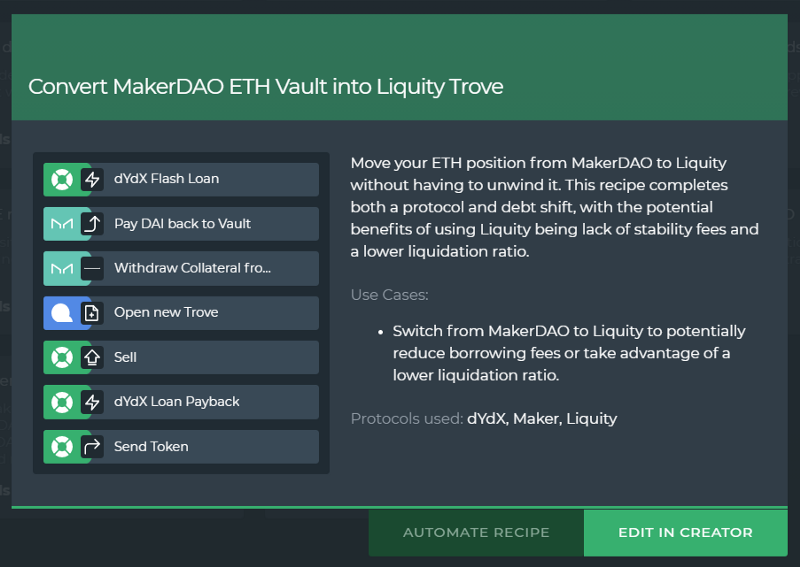
At time of writing, the only pre-made recipe for Liquity is one that migrates a MakerDAO ETH Vault to a Liquity Trove. You can use it here. If you’re still debating whether this is the optimal choice, here’s two resources that will help you out:
- Comparison Series: Liquity and MakerDAO Pt.1
- Liquity is live at DeFi Saver — should you consider switching?
Recommendation: If you create a DSProxy beforehand, the Recipe Creator will track values after each step and make adjustments to the recipe much easier.

After accessing the recipe, you’ll have to make some adjustments. Here’s an example I created:
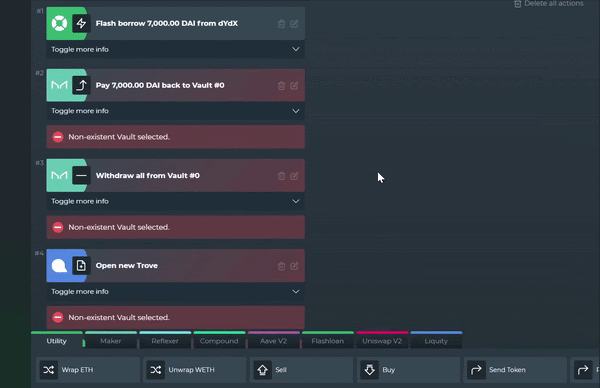
Once you click “Execute”, transactions will appear for you to sign and approve, and when they’re all completed, you’ll have successfully migrated from Maker to Liquity! Using the Recipe Creator takes all of the stress out of doing each of these transactions manually.
Now that you’re familiar with the Recipe Creator, I’ll provide some more recipes you may find useful:
- Open a Trove and Deposit LUSD into the Stability Pool
- Open a Leveraged Trove (can increase the leverage if needed)
- Reflexer to Liquity Migration
- Compound (ETH-stablecoin) to Liquity Migration
- Aave (ETH-stablecoin) to Liquity Migration
Note: Swap rates won’t look great in Simulation Mode as it only checks Uniswap V2/V3 liquidity, but DeFi Saver uses DEX aggregation powered by 0x for any real transactions.
What’s next?
At this point, you should have most of the information you need to get started with DeFi Saver! To learn more, explore DeFi Saver’s available resources here:
Resources: Website | Twitter | Discord | Telegram | Github | Reddit |